Vacation Rental Emergency Response Plan: Manager's Guide
Create a vacation rental emergency response plan to protect guests and your property. Discover essential checklists and action steps now!

Vacation Rental Emergency Response Plan: Manager’s Guide
A solid vacation rental emergency response plan does one thing above everything else: it keeps guests safe and your property protected before you ever have to improvise under pressure. The single most important action you can take right now is to create a one-page emergency action checklist, post it visibly at your property, and store a digital copy where your whole team can access it instantly. FEMA guidance is clear that having a plan means nothing without regular practice, and the same principle applies to your rental operation.
Your 48-hour quick-start checklist:
- Walk every room and exterior area for hazards: loose railings, blocked exits, expired extinguishers, and untested smoke or CO alarms
- Post a one-page guest emergency notice at the front door and inside the welcome binder with local 911, poison control (1-800-222-1222), the nearest hospital address, and your direct contact number
- Save your local county emergency management website, FEMA flood map, and nearest fire station number to a shared team document
Three immediate actions for this week:
- Confirm smoke detectors and CO alarms are functional in every sleeping area and hallway
- Identify and label all utility shutoffs (gas, water, electricity) with laminated instruction cards
- Create a shared contact list with your top three emergency vendors (plumber, electrician, HVAC) and distribute it to every team member
Table of Contents
- How do you assess local and property-specific hazards?
- What does a property-specific emergency response plan need to include?
- How should you communicate with guests during an emergency?
- What are the five operational response stages for vacation rentals?
- Which safety devices do you need, and how do you maintain them?
- What emergency supplies does every vacation rental property need?
- How do you train your team and vet emergency vendors?
- How do you run drills and keep the plan current?
- What does a realistic rollout timeline and budget look like?
- Practical templates and checklists you can deploy right now
- How does operations software help you scale emergency response?
- Key Takeaways
- What the plan actually teaches you when you use it
- Realtevoos makes emergency response faster and more consistent
- Useful sources and further reading
How do you assess local and property-specific hazards?
Start with your county’s emergency management website and FEMA’s flood map service. These tools tell you whether your property sits in a flood zone, a wildfire-risk corridor, or a hurricane evacuation zone. NOAA’s climate data portal adds storm frequency and severity history for your specific region. For properties in coastal North Carolina, for example, the NCREC hurricane guidance outlines specific host obligations during evacuation orders.
Once you know the macro-level risks, move to the property itself. Check site elevation relative to nearby waterways, the condition of access roads during heavy rain or snow, vegetation proximity to structures (wildfire buffer), and the age and condition of your electrical panel and gas lines. These physical factors determine which hazards are truly high-priority versus theoretical.
Use this simple risk-priority matrix to sequence your mitigation work:
| Hazard | Likelihood | Impact | Priority | Mitigation Action |
|---|---|---|---|---|
| Power outage | High | Medium | High | Generator or battery backup, flashlights |
| Flood | Medium | High | High | Elevation check, sandbags, guest alert protocol |
| Wildfire | Medium | High | High | Defensible space, evacuation route map |
| Hurricane | Low–Medium | High | High | Shutters, evac route, early guest notification |
| Gas leak | Low | High | High | CO/gas detector, shutoff instructions |
| Winter storm | Medium | Medium | Medium | Salt/sand supply, road check protocol |
| Active shooter | Very low | High | Medium | Lockdown procedure, local law enforcement contact |
| Medical emergency | Medium | High | High | First aid kit, nearest ER address, AED if feasible |
Bookmark your state emergency management agency’s page and your county’s shelter-in-place and evacuation zone maps. Store those links in your SOP and in your guest welcome materials.
What does a property-specific emergency response plan need to include?
The IREM Emergency Response Playbook defines the minimum contents of any property-level SOP: a response team structure, communications procedures, vendor lists with alternates, and notification processes. For vacation rentals, that framework expands to cover guests directly.
Required SOP sections:
- Property details (address, GPS coordinates, access codes, parking)
- Emergency contacts (owner, manager, local staff, 911, utilities, poison control)
- Evacuation routes and assembly points with a printed floor map
- Utility shutoff locations and step-by-step instructions
- Guest-facing emergency instructions (language-accessible, printed and digital)
- Roles and responsibilities for owner, manager, on-site staff, and contractors
- Pre-vetted vendor list with 24/7 contacts (plumber, electrician, HVAC, restoration)
- Insurance documentation (policy numbers, carrier contacts, coverage summary)
- Data backup and cybersecurity procedures for guest records
- Incident log and post-event recovery steps
Sample SOP table of contents:
| Section | Contents |
|---|---|
| 1. Property Profile | Address, access codes, utility locations, GPS pin |
| 2. Emergency Contacts | Owner, manager, staff, vendors, local authorities |
| 3. Evacuation Plan | Routes, assembly point, floor map, local shelter address |
| 4. Utility Shutoffs | Gas, water, electricity — location and instructions |
| 5. Guest Instructions | One-page card, QR code, welcome binder insert |
| 6. Roles & Responsibilities | Who does what, escalation chain |
| 7. Vendor Roster | Name, service, phone, backup contact |
| — | Policy numbers, carrier, coverage types, deductibles |
| 9. Data & Cybersecurity | Cloud backup location, access credentials, breach protocol |
| 10. Incident Log & Recovery | Template, photo storage, post-event checklist |
Your guest emergency card should include: property address, owner/manager phone, local 911, nearest hospital, evacuation assembly point, and utility shutoff locations. Print it in a laminated card, insert it in the welcome binder, and add a QR code linking to the digital version. Local regulatory requirements vary by jurisdiction, so confirm what your county mandates for posted safety information.
On the insurance side, verify that your policy covers short-term rental activity specifically. Check for business interruption coverage, liability limits for guest injuries, and whether your deductible applies per-event or per-season. Keep policy numbers and your carrier’s claims line in the SOP and in a separate cloud folder.
How should you communicate with guests during an emergency?
Clear, fast, and channel-appropriate communication is what separates a managed crisis from a chaotic one. Your primary objectives are safety first, then clarity, then reassurance. The timing breaks into four phases: pre-stay warnings (sent at booking confirmation and 48 hours before arrival), pre-event check-in (when a storm or hazard is forecast), real-time alerts (during an active emergency), and post-event updates (once the situation is resolved).
Channel decision rules:
- SMS: Use for immediate action required. Short, direct, no more than 160 characters. Guests read texts within minutes.
- Email: Use for detailed instructions, alternative lodging options, and compensation policies. Attach the evacuation map.
- Printed notice: Post at the front door and inside the unit for on-site visibility when cell service is unavailable.
Sample SMS template (evacuation alert): “URGENT: [Property Name] — mandatory evacuation order issued. Please leave now via [Route Name]. Assembly point: [Location]. Call [Manager Name] at [Phone]. Your safety is the priority.”
Sample email template (post-event update): Subject: Update on your stay at [Property Name] “We wanted to reach out with an update following [event]. The property has been [assessed/cleared/temporarily unavailable]. [Next steps for guest: return date, alternative accommodation, refund policy]. Please contact us at [phone/email] with any questions.”
Store all templates in a shared, cloud-accessible folder — not just on one person’s phone. When the manager is unavailable, any team member needs to send the right message within minutes.
Confirm receipt by requesting a reply or read receipt on SMS platforms that support it. For high-severity events, a personal call or a local staff visit is non-negotiable. Automation handles volume; a human voice handles fear.
Pro Tip: Set up pre-written message templates in your property management system now, before any emergency occurs. Realtevoos’s automated messaging tools let you store, trigger, and confirm delivery of guest alerts without scrambling to draft copy under pressure.

What are the five operational response stages for vacation rentals?
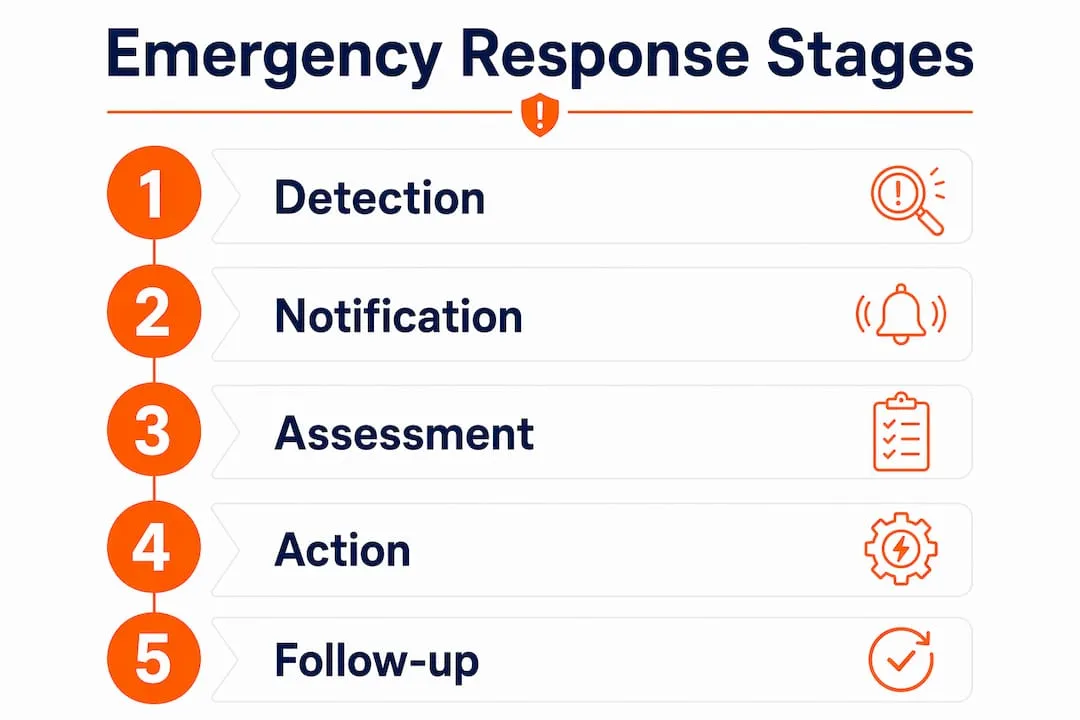
Every effective crisis management process for rentals follows the same sequence: detect, triage, execute resolution, document, analyze and update. Skipping any stage, especially documentation, is what turns a one-time incident into a recurring liability.
- Detect: A guest call, a sensor alert, a cleaner’s report, or a weather notification triggers the response. Every team member must know the reporting channel (a dedicated phone line, a shared inbox, or a PMS ticket).
- Triage: Assess severity immediately. Is this life-threatening? Does it require guest evacuation? Can it wait until morning? Assign a severity level (Critical / High / Medium / Low) and activate the corresponding protocol.
- Execute resolution: Dispatch the appropriate vendor, contact local authorities if needed, and notify the guest with the correct template. For a water leak: shut off the supply valve, call the plumber, move guests if necessary, and document the time of each action.
- Document: Log every action in the incident record with timestamps, photos, vendor names, costs, and guest communications. This record protects you with insurers and owners.
- Analyze and update: After resolution, run a brief after-action review. What slowed the response? Which vendor underperformed? Update the SOP and vendor list accordingly.
Incident log template fields:
| Field | Description |
|---|---|
| Date/Time | When the incident was reported |
| Reporter | Guest, cleaner, sensor, or staff member |
| Property | Address and unit |
| Severity | Critical / High / Medium / Low |
| Description | What happened, initial observations |
| Actions Taken | Timestamped steps, who did what |
| Photos | File names or cloud links |
| Vendor Dispatched | Name, arrival time, resolution time |
| Costs | Estimated and actual |
| Guest Communication | Channel used, message sent, receipt confirmed |
| Resolution | Final status and date closed |
Water leak example: Guest reports water dripping from the ceiling at 9:14 PM. Manager receives the alert at 9:16 PM, assigns Critical severity, and calls the on-call plumber at 9:17 PM. Plumber arrives at 9:52 PM. Manager sends guest SMS at 9:18 PM with apology and resolution timeline. Plumber resolves the issue at 10:40 PM. Manager sends follow-up SMS at 10:45 PM. Incident log closed at 11:00 PM with photos and invoice attached. For structured incident reporting across multiple properties, a centralized dashboard makes this sequence repeatable.
Which safety devices do you need, and how do you maintain them?
Every vacation rental must have, at minimum: smoke detectors in every bedroom and hallway, CO alarms on each floor, a fire extinguisher in the kitchen and near any fireplace, emergency lighting in hallways and stairwells, clearly posted evacuation maps, and labeled utility shutoffs. The U.S. Fire Administration tracks hotel and lodging fire data and consistently identifies missing or non-functional detectors as a contributing factor in preventable incidents.
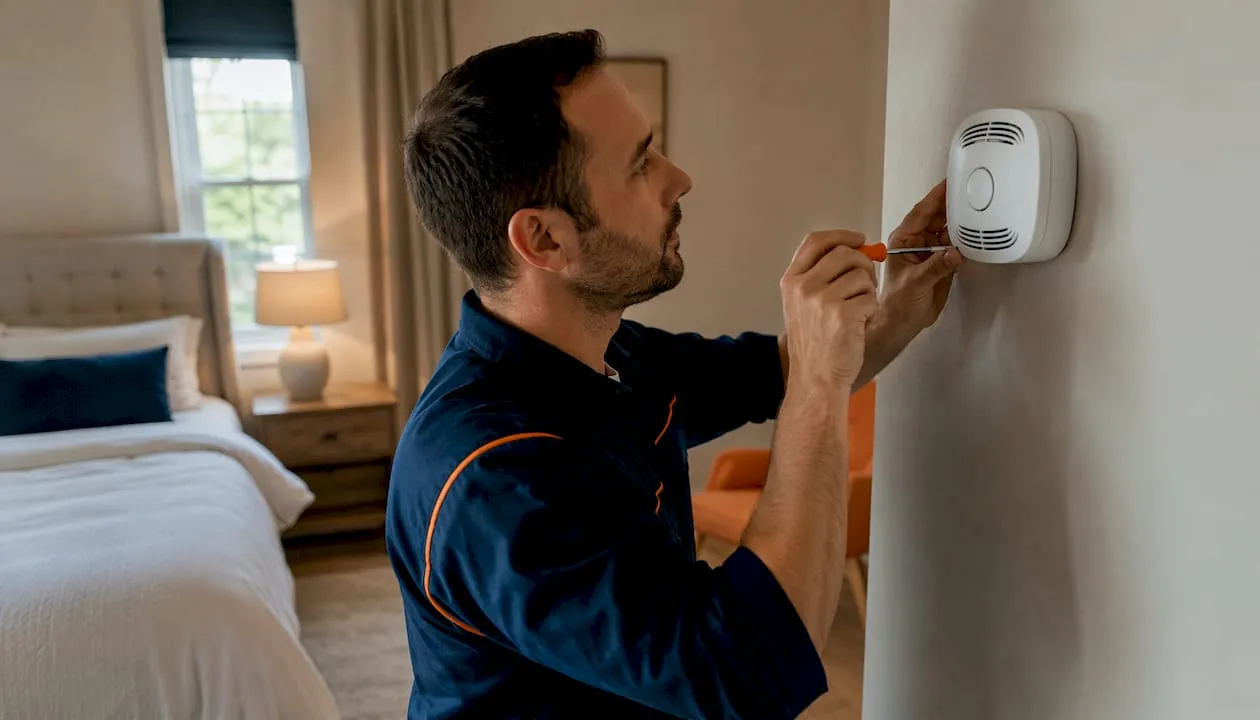
Pre-stay safety checks should include inspecting for trip hazards, testing door and window locks, and verifying all alarms are functional before each guest arrival. Beyond that, a documented maintenance schedule is what keeps you defensible with insurers and local authorities.
Safety device maintenance schedule:
| Device | Test Frequency | Who Tests | Record Kept |
|---|---|---|---|
| Smoke detectors | Monthly + pre-stay | Cleaner or manager | Log with date and result |
| CO alarms | Monthly + pre-stay | Cleaner or manager | Log with date and result |
| Fire extinguisher | Annual inspection | Certified technician | Tagged inspection card |
| Emergency lighting | Quarterly | Manager or staff | Photo log |
| Evacuation maps | Annual review | Manager | Version date on map |
| Utility shutoff labels | Annual review | Manager | Photo log |
| First aid kit | Quarterly restock | Cleaner or manager | Inventory checklist |
Pro Tip: After every test, take a dated photo of the device and its indicator light. Store photos in a shared cloud folder organized by property and device type. When an insurance claim or owner audit arises, that photo trail is worth more than any verbal assurance.
For predictive maintenance that flags device age and service intervals automatically, integrating your maintenance tracking with a platform that surfaces these alerts removes the risk of a missed inspection.
What emergency supplies does every vacation rental property need?
Every property needs a minimum kit stocked and accessible before the first guest checks in. An extended kit makes sense for properties in high-risk zones (coastal, wildfire-prone, or remote areas with limited emergency services).
Minimum kit (every property):
- Flashlights with fresh batteries (one per bedroom plus one in the kitchen)
- First aid kit with bandages, antiseptic, pain relievers, and emergency contact card
- Potable water: at least one gallon per occupant for 72 hours
- Basic tools: adjustable wrench, screwdriver set, utility knife
- Blankets or emergency mylar blankets (one per max occupancy)
- Lighter or waterproof matches
- Laminated emergency contact and evacuation card
Extended kit (high-risk or remote properties):
- Portable battery charger/power bank (10,000 mAh minimum)
- Tarp and bungee cords for temporary roof or window protection
- Sandbags (pre-filled or empty with sand source nearby)
- Spare bedding in a waterproof bag
- Battery-powered or hand-crank weather radio
- N95 masks (wildfire smoke or air quality events)
- 7-day water supply for max occupancy
A minimal kit typically costs a moderate amount per property when sourced from hardware and wholesale retailers. An extended kit for high-risk properties can cost several hundred dollars, depending on occupancy size and generator needs. Restock perishables (water, batteries, first aid supplies) every six months, and log each restock in your maintenance tracker. Cleaners are often the first to notice depleted supplies, so include a supply checklist in your cleaning service turnover protocol.
How do you train your team and vet emergency vendors?
Training is not optional. Every person who touches your property, including on-site staff, remote managers, and regular contractors, needs to know the emergency procedures before an incident happens. Onboarding training covers the SOP, evacuation routes, utility shutoffs, and communication protocols. Scheduled refreshers keep that knowledge current.
Vendor vetting checklist:
- Confirmed 24/7 availability with a direct emergency line (not just a business hours number)
- Verified general liability and workers’ compensation insurance
- Written response time commitment (SLA): 60 minutes for Critical, 4 hours for High
- At least two verifiable references from property managers in your area
- A named backup vendor for each trade in case the primary is unavailable
Include these clauses in every vendor or contractor agreement:
- Response time commitment: “Vendor agrees to respond to Critical-severity calls within [X] hours of notification.”
- Priority language: “Vendor agrees to prioritize [Property Manager Name] properties during declared local emergencies.”
- Documentation requirement: “Vendor will provide a written invoice and photo documentation within 24 hours of job completion.”
Run a full emergency drill annually, a property walkthrough semi-annually, and a tabletop review quarterly. The tabletop format works well for remote managers: walk through a scenario (e.g., a hurricane warning 36 hours out) and identify every decision point, communication step, and vendor call. Log attendance and outcomes for each session.
How do you run drills and keep the plan current?
FEMA recommends that plans be practiced and updated regularly, with annual drills or walkthroughs involving staff and contractors. A plan that sits in a binder and never gets tested is a liability, not an asset.
Recommended drill cadence:
- Annual full drill: Simulate a realistic emergency (fire, flood, or hurricane) with all staff, key vendors, and a walkthrough of the physical property. Measure response times against your SOP targets.
- Semi-annual walkthrough: Walk the property with your manager and cleaner. Check every safety device, restock supplies, and verify that evacuation maps and utility labels are current.
- Quarterly tabletop exercise: A 30-minute scenario discussion with your team. No physical movement required. Focus on decision-making, communication, and vendor escalation.
After-action report template fields:
- Date and drill type
- Participants
- Scenario simulated
- What worked well
- Gaps identified
- Assigned fixes with owner and deadline
- Plan version updated (yes/no)
- Next drill date
Guest feedback is an underused input for plan improvement. After any real incident or even a near-miss, a brief follow-up message asking guests what information they needed and when they needed it surfaces gaps that internal reviews miss entirely.
Assign a version number and date to every SOP revision. Distribute updated copies to all staff, post the current version in your shared drive, and replace printed copies at the property. A maintenance tracking system that logs version changes and distribution records keeps this process auditable.
What does a realistic rollout timeline and budget look like?
A single-property emergency plan can be fully operational within a few weeks, depending on existing infrastructure. Multi-property portfolios generally require a longer timeline for initial rollout.
Rollout timeline:
| Week/Month | Task | Responsible |
|---|---|---|
| Week 1 | Risk assessment, hazard matrix, local authority contacts | Owner/Manager |
| Week 2 | SOP draft: contacts, routes, shutoffs, roles | Manager |
| Week 3 | Supply purchase (minimum kit), device testing | Manager/Staff |
| Week 4 | Vendor outreach, vetting, contract clauses | Manager |
| Month 2 | First tabletop drill, SOP revision, insurance review | Owner/Manager |
| Month 3 | Full property walkthrough drill, guest card printed, QR code deployed | Manager/Staff |
| Quarterly | Supply restock, device test, tabletop review | Manager |
| Annually | Full drill, SOP version update, insurance policy review | Owner/Manager |
Budget estimates (single property):
- One-time setup: $300–$800 (supplies, signage, laminated cards, QR code setup, vendor contract review)
- Annual maintenance: $150–$400 (supply restocks, device inspections, drill time, SOP updates)
- High-cost variables: Portable generator ($500–$2,000+), structural repairs, vendor retainer agreements
Sequence your spending by impact-per-dollar. Safety devices and guest communication materials come first. Generators and structural upgrades follow once the plan framework is in place. For revenue protection after a disruptive event, having business interruption coverage and a financial reserve of at least one month’s gross revenue gives you the runway to recover without distress pricing.
High-impact, low-cost actions to prioritize first:
- Post laminated emergency card at the property ($5–$10)
- Test and replace smoke/CO detector batteries ($15–$30)
- Create and share a team emergency contact list (free)
- Bookmark local emergency management and FEMA flood map pages (free)
- Draft three SMS templates and store them in your PMS (free)
Practical templates and checklists you can deploy right now
The most useful templates are the ones that are already formatted, stored where your team can find them, and updated on a schedule. Here is the core library every property manager needs:
- Guest emergency card: Property address, manager phone, 911, nearest ER, evacuation assembly point, utility shutoff locations. Print laminated, insert in welcome binder, link via QR code.
- SOP table of contents: The ten-section structure from the plan components section above, formatted as a Word or Google Doc template.
- Incident log: The eleven-field template from the operational response section, stored in your PMS or a shared Google Sheet.
- Vendor call script: “This is [Name] from [Property Management Company]. I have a [severity level] emergency at [address]. I need [service] immediately. Can you confirm your ETA?” Store as a printed card in the operations binder.
- SMS/email templates: Pre-written for evacuation, water damage, power outage, and post-event follow-up. Stored in your PMS messaging library.
- After-action report: The eight-field template from the drills section, used after every drill and real incident.
Distribute templates in three formats: a printed binder at the property, a shared cloud folder (Google Drive or Dropbox) accessible to all team members, and uploaded directly into your PMS for in-platform access. Add a QR code inside the front door that links guests to the digital emergency card. Cleaners and contractors can use the same QR code to report issues instantly. For standardized SOP language that holds up across multiple properties, consistent terminology in every template reduces confusion during high-stress moments.
Store master templates in a version-controlled folder with the date of last revision in the file name (e.g., “Incident-Log-v3-2026-03.docx”). When you update the plan, replace all distributed copies and notify your team.
How does operations software help you scale emergency response?
Software does not replace judgment during a crisis. What it does is eliminate the manual steps that slow you down when speed matters most. An operations platform can automate guest alerts, confirm message delivery, dispatch vendors from a pre-loaded contact list, and log every action with timestamps and photos, all from a single interface.
The real advantage of centralizing emergency workflows in a platform is not speed alone — it is consistency. When every incident follows the same documented process, your response quality does not depend on which team member happens to be on call.
Capabilities that directly support emergency response:
- Mass SMS and email messaging with delivery confirmation
- Pre-stored message templates triggered by incident type or severity
- Incident log with photo attachments, timestamps, and cost fields
- Vendor directory with contact details, SLAs, and dispatch history
- Status dashboard showing open incidents across all properties
- Automated owner reporting after incident closure
- Integration with Airbnb, Vrbo, and PMS platforms for guest contact data
Implementation checklist for adding your plan to a platform:
- Upload all SOP documents and templates to the platform’s document library
- Import guest contact data from your PMS or channel manager
- Create canned message templates for each emergency type (evacuation, water damage, power outage)
- Add all vetted vendors with their emergency contact numbers and SLA notes
- Configure automated owner notification triggers for Critical and High severity incidents
- Test the full workflow with a simulated incident before going live
Example workflow: A CO alarm triggers at 2:00 AM. The platform sends an automated guest SMS at 2:01 AM with evacuation instructions. The manager receives a push notification and dispatches the HVAC vendor from the platform’s vendor directory at 2:03 AM. The incident log auto-populates with the alert time, guest message sent, and vendor dispatched. The owner receives an automated summary at 7:00 AM. Post-resolution, the platform prompts the manager to close the incident, attach the vendor invoice, and send a guest follow-up message.
Realtevoos’s automated maintenance request workflows handle exactly this kind of multi-step dispatch and documentation sequence, removing the risk of a missed step at 2:00 AM.
Pro Tip: Connect your guest contact data from Airbnb and Vrbo directly to Realtevoos so that emergency SMS messages reach guests on the platform they booked through, without manual lookup during an incident.
Key Takeaways
A complete vacation rental emergency response plan requires risk assessment, a written SOP, pre-tested communication templates, vetted vendors, scheduled drills, and a documented incident log — all in place before any emergency occurs.
| Point | Details |
|---|---|
| Start with local risk assessment | Use FEMA flood maps and county emergency management tools to identify your property’s top three hazards before writing any plan. |
| Build a ten-section SOP | Cover contacts, evacuation routes, utility shutoffs, guest instructions, vendor roster, insurance, and incident log in one document. |
| Pre-write all communication templates | Store SMS, email, and printed templates in your PMS before an emergency so any team member can send the right message in minutes. |
| Drill on a set schedule | Run a full annual drill, semi-annual walkthrough, and quarterly tabletop exercise; log attendance and after-action findings every time. |
| Realtevoos centralizes the workflow | Realtevoos automates guest alerts, vendor dispatch, incident logging, and owner reporting from one platform across all your properties. |
What the plan actually teaches you when you use it
Most property managers build their emergency plan and feel prepared. The ones who have actually activated it know that the plan’s value is not in the document itself. It is in the decisions you made before the crisis arrived.
The clearest lesson from any real activation is that communication gaps appear faster than operational gaps. The vendor shows up. The guest does not know where to go. The owner cannot reach the manager. The printed evacuation map is three years old and shows a road that is now gated. These are not equipment failures. They are documentation and communication failures, and they are entirely preventable.
Three lessons that hold across almost every real incident: First, your guest communication templates need to be tested on the actual channels you use, not just drafted and filed. Send a test SMS through your PMS to yourself before any storm season. Second, vendor availability during a declared local emergency is not guaranteed even with a signed agreement. Always have a named backup for every critical trade. Third, keep a separate, brief owner communication template ready. Owners need a factual, calm update within two hours of any significant incident. A structured owner reporting process prevents the kind of reactive, emotional calls that complicate recovery.
The plan is not a one-time project. It is a living document that gets sharper every time you use it, drill it, or update it after a near-miss. The managers who treat it that way are the ones whose guests never notice how much work went into keeping them safe.
Realtevoos makes emergency response faster and more consistent
When an emergency hits at 2:00 AM across three properties simultaneously, the difference between a managed response and a chaotic one is whether your team has a single place to act, communicate, and document. Realtevoos gives vacation rental managers exactly that: one command center for incident logs, automated guest messaging, vendor dispatch, and owner reporting, all connected to your Airbnb and Vrbo guest data.

Three capabilities that directly support your emergency plan:
- Automated guest SMS and email with delivery confirmation, triggered by incident type, so the right message reaches guests in under two minutes without manual drafting
- Incident logs with photo attachments that capture timestamps, vendor details, and costs in one record, ready for insurance claims and owner reports
- Vendor contact automation that dispatches your pre-vetted contractors from a centralized directory, with SLA tracking built in
Your emergency plan is only as strong as the system that executes it. See how Realtevoos’s Command Center consolidates every step of your incident response workflow, and request a demo to walk through the emergency messaging and dispatch features with your own property data.
Useful sources and further reading
Verify local evacuation rules, flood zone classifications, and insurance requirements for your specific jurisdiction before finalizing your plan. These resources are the authoritative starting points:
- FEMA — Know Your Risk (Homeowners): Flood zone maps and risk assessment tools for every U.S. property address
- FloodSmart.gov: National Flood Insurance Program guidance, coverage options, and flood risk education
- NOAA Climate.gov — Billion-Dollar Disasters: Annual U.S. weather and climate disaster data to benchmark your local hazard frequency
- U.S. Fire Administration — Hotel and Motel Fires: Fire prevention data and safety standards applicable to short-term rental lodging
- IREM Emergency Response Playbook: Property management SOP framework covering response teams, vendor lists, and communications
- NCREC — Hurricanes and Vacation Rentals: State-level guidance on host obligations during hurricane evacuation orders (North Carolina; check your state’s equivalent)
- Safety Management Group — Seven Elements of Emergency Action Planning: Practical framework for structuring drills, rally points, and after-action reviews
- Rent Responsibly — Emergency Preparedness Guide: Minimum plan contents and guest-facing checklist guidance for vacation rental hosts
Save your county emergency management agency’s page and your state’s evacuation zone map as bookmarks in your SOP and in your guest welcome materials. Local guidance changes seasonally, and your plan should reflect the current version, not last year’s.